My Mac is a finely tuned machine. I have been using a Mac for Unix
systems administration work since 2006, starting with a PowerMac G4, and
have developed a smooth and efficient workflow. Most of the important
tools are open source, and the ones that are not are very high quality.
Hardware
One of the reasons I like buying Apple hardware is that it lasts. I run
a four year old MacBook Pro, and so far have no reason to upgrade to a
newer machine. I will probably upgrade to a solid-state drive sometime
in the next few months, and expect to keep this Mac another two years.
Last year I upgraded the RAM to 8GB, and that seems to work fine for me.

The Mac spends most of its day in a Twelve South BookArc in the corner
of my desk. I’m obsessive about cables, so I have the Ethernet, power,
time machine drive, headphones, and external monitor neatly Velcro’d
under my desk and out of sight. I have tacks holding sections of Velcro
under my desk to route the cables where they need to go. Work provides a
22-inch Acer display, which is not great, but acceptable for what I need
to do. I would love a higher density display for text clarity, but I’ll
take what I can get.
I use the Apple aluminum bluetooth keyboard. I love it because it is
small, has only the keys that I use, and is easy and fast to type on. I
mostly agree with the reasons David
Sparks
mentions in his keyboard review, but I haven’t bothered to look into the
noisy mechanical keyboards. Mostly because I work in an office
environment, and the noise would bother my coworkers. I also use an
Apple Magic Mouse my wife gave me for my birthday a couple years ago.
The ergonomics of the mouse are not great, but since my hand is not on
the mouse all day, that doesn’t bother me. What I do love about it is
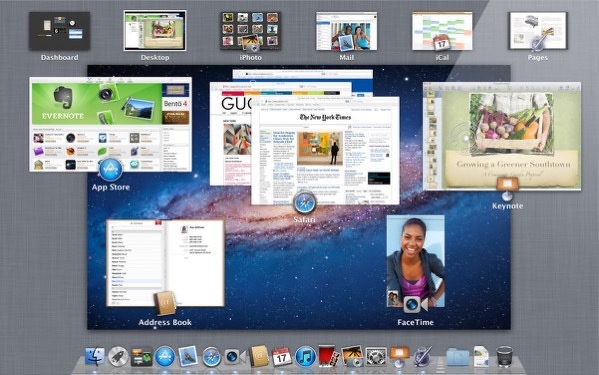
being able to flick back and forth between full-screen applications,
browse through Safari history, and double-two-finger-tap to bring up
Mission Control.
Other than my iPhone, the only other hardware I use is a Western Digital
drive I keep under my desk, secured with a lock, cables neatly wrapped
in Velcro, as my Time Machine drive.
Software
The first and most important piece of software I install is
Quicksilver.
Without Quicksilver, my machine is crippled. I map Quicksilver to
⌘Space, so the first preference I change is to disable both the “Show
Spotlight search field” and “Show Spotlight window”. I use Spotlight
frequently, but when I need it I use the mouse and click on the menu bar
icon. I install a few plugins for Quicksilver, but the most important
are the Remote Hosts Plugin, the User Interface Plugin, the Web
Search Plugin, and the Clipboard Plugin.
After Quicksilver is installed I feel at home, and I can start using the
computer. Behind Quicksilver, the most used app on my Mac is the
Terminal. I used iTerm 2 in the past, but Apple has continued to improve
the built in Terminal app and I don’t feel like I need it anymore, or at
least don’t see what value iTerm provides that Terminal does not. I use
Anonymous Pro,
14 point, and make my default window size 80 columns x 40 rows. Next, I
install Homebrew, and from Homebrew install
zsh, and then
oh-my-zsh.

I was sold on zsh when I accidentally discovered that it would do tab
auto-complete for directories on a different server over an ssh
connection. I think I was typing something like:
scp server.whatever:/~/somedir/
I hit tab out of habit, and it autocompleted the rest of the scp
command. I sat there and thought about it for a few minutes, and
realized that it must have known that I was typing an scp command,
parsed the remainder of the command to get the server, checked for ssh
auto-login with keys, and then parsed out the files available for
autocomplete. There is also great stuff like batch file renaming with
zmv, and glob
autocomplete for things like cd. Here’s another example, say I want to
cd into a directory named “something-awesome”, I can type “cd awesom”
and tab, and zsh will recognized I want to get into the
“something-awesome” directory.
Speaking of SSH, the next thing to take care of is SSH keys. I always
use SSH keys to log into servers without a password, and I recently
generated a new SSH key pair. To do so, open up the Terminal and run
ssh-keygen -t rsa and enter a password that is reasonably complex, but
one that you can remember. The first time you use that key, OS X will
prompt you to save your password in the system keychain, which I do. If
my computer is compromised, whoever has it will have access to the
unlocked key, but without being on our local company network it is of
little use. The password keeps the key from being used if it is removed
from my machine, so I feel it is a good compromise between usability and
security. My public key is given to Puppet, and from there is added to
my local user account on all the servers I manage.
Next I create a ~/Unix directory, and then ~/Unix/bin and ~/Unix/etc.
Inside of ~/Unix/etc I put a plain text “servers” file that lists one
server per line for each server that I manage. This list is important
because I base a lot of my other scripts off of that list. It is the
source of truth that I measure Nagios, Puppet, and any other tools we
use that need to touch each server.
The first use of the servers list is a quick loop to populate my
~/.ssh/known_hosts file.
for each in `cat ~/Unix/etc/servers`; do ssh -oStrictHostKeyChecking=no $each hostname done
Assuming Puppet has done its job and distributed the SSH key, this loop
will touch each server in the list, add the key to the known_hosts file,
and return the output of the “hostname” command to the terminal, along
with a warning that it is doing so. Once the loop is finished, it’s time
for Quicksilver to work its magic. In the Quicksilver preferences, under
the Catalog tab, and the Plugins option in the left-hand panel (whew),
there should be a source option for “Remote Hosts”. Clicking on the
triangle will reveal the available sources, one of which will be our
known_hosts file. Make sure that is selected and click the circular
arrow button in the bottom right corner to rescan, and a number should
appear.
This is how I manage getting to any server at a moments notice. I bring
up Quicksilver, start typing the name of the server, and when I see the
full name of the machine I hit return. Quicksilver launches Terminal
with a SSH session open, and since I already have my key traded out, I’m
logged right in.
There are times when Quicksilver isn’t quite quick enough. When I need
to make the exact same change to a group of servers, I use another tool
installed through Homebrew: csshX.
The csshX tool is a Cluster SSH implementation for OS X, and can
drastically speed up common tasks. For example, when migrating from one
NFS server to another, the NFS mounts are the same for every server, and
each needs to be unmounted and remounted again. This would be a good job
for Puppet, but for various reasons can not be. The csshX tool lets me
open up several windows at once and type the same commands in each of
them. It has saved me hours of repetitive, dull work.
Managing windows is not something I care to do, so I let
Moom from Many Tricks do it for me. I
have ⌘⎇1 mapped to move the current window to take up the left half of
the screen, and ⌘⎇2 mapped for the right. I use this combination daily
to split my screen between something I need to read and something I need
to type.
I use Safari as my main browser, but there are a few internal tools that
do not work correctly, like HP’s “Onboard Administrator” and a couple of
other tools that need Flash, like the web interface for VMware. So, in
addition to Safari I also keep Firefox and Google Chrome handy. I don’t
bother doing any customization in either of the auxiliary browsers. I’m
normally in and out of them quickly, and use them just long enough to
accomplish the task at hand. For Safari, I use a handful of plugins
which hint a bit more about my workflow:
I set my homepage to DuckDuckGo, and set both
new windows and new tabs to open with Top Sites. I also switch my
preferred search engine to Yahoo and edit my /etc/hosts file to add
this line:
184.72.115.86 search.yahoo.com
When I open a new window or tab in Safari the Top Sites feature lets me
choose to click on Nagios, Puppet, or our internal wiki, or just start
typing to do a DuckDuckGo search. If I do a search, DuckDuckGo includes
javascript that lets me use vi keybindings to navigate the search
results. DuckDuckGo also includes a “bang” syntax that lets me search
other sources, like man pages.
Once on a new page, the Type-To-Navigate plugin lets me type in the name
of a link to highlight it, and I can press return to open it, or ⌘return
to open it in the background. This lets me quickly search for and browse
documentation outside of our local wiki.
When I find relevant, detailed documentation, I clip it into my
technical database held in DEVONthink
Pro.
I quickly became frustrated with DEVONthink in the past when I
misunderstood how it was meant to be used. DEVONthink is not an
anything
bucket, it
is a specialized research tool meant to provide insight into your data.
Once I read about how
historians
use DEVONthink the pieces began to click for me. I now drop all my
technical documentation into DEVONthink, organized into a hierarchy
similar to scientific classifications of species. CentOS is of the class
Linux, which is of the class Unix, which is part of the class of
Operating Systems, which falls under the top level class of Software.
Also kept in DEVONthink is what software is installed on what server,
and what hardware is associated with each server. This way I keep a
deep, running database of the systems I’m responsible for, and
synchronize the data to my phone for reference when I’m in the
datacenter. DEVONthink keeps documentation that far exceeds the level of
detail in our wiki.
Part of the documentation we keep are high-level network diagrams,
organized by system. I draw the diagrams in
OmniGraffle, which I recently
upgraded from version 4, originally purchased so long ago I forgot
exactly when. OmniGraffle keeps getting better, and like the Mac, has a
long shelf life. I export completed diagrams to PDF for inclusion in the
documentation.
Finally, tasks and projects are handled in
OmniFocus. Each system
becomes a project, and each project has a list of tasks associated. A
new recurring task for each project is to review and update the
documentation semi-annually. In reality, the documentation is constantly
in flux, but it is good to have a reminder to do an overall review to
make sure we are where we need to be.
Over time my workflow has grown, and then condensed again, and finally
settled into a workable, reproducible, long-term system. When I get into
the groove, listening to old Grateful Dead bootlegs or Bob Marley in
iTunes, I don’t even notice the tools anymore. My system fades into the
background, and all that is left is the thoughtful bliss of real
productivity.